
Salt Dough Recipe: The Perfect Craft for Homemade Decorations
If you’re looking for an affordable and fun craft to do with your little ones, this salt dough recipe is just what you need. Not only will it keep your kids entertained, but it will also result in beautiful salt dough ornaments that you can cherish for years.
Whether you’re making Christmas decorations, birthday gifts, or just a creative afternoon project, this DIY salt dough ornament recipe will have you hooked in no time.
🧂 What Is a Salt Dough Recipe?
The salt dough recipe is a simple combination of flour, salt, and water that’s baked to form a solid, durable dough. Once it’s baked, it can be painted, decorated, and transformed into adorable dough ornaments. These homemade ornaments are perfect for hanging on your holiday tree, giving as gifts, or just keeping as sentimental keepsakes.
Salt Dough Recipe
Ingredients
- 2 cups all-purpose flour
- 1 cup salt
- ¾ cup water adjust as needed
Instructions
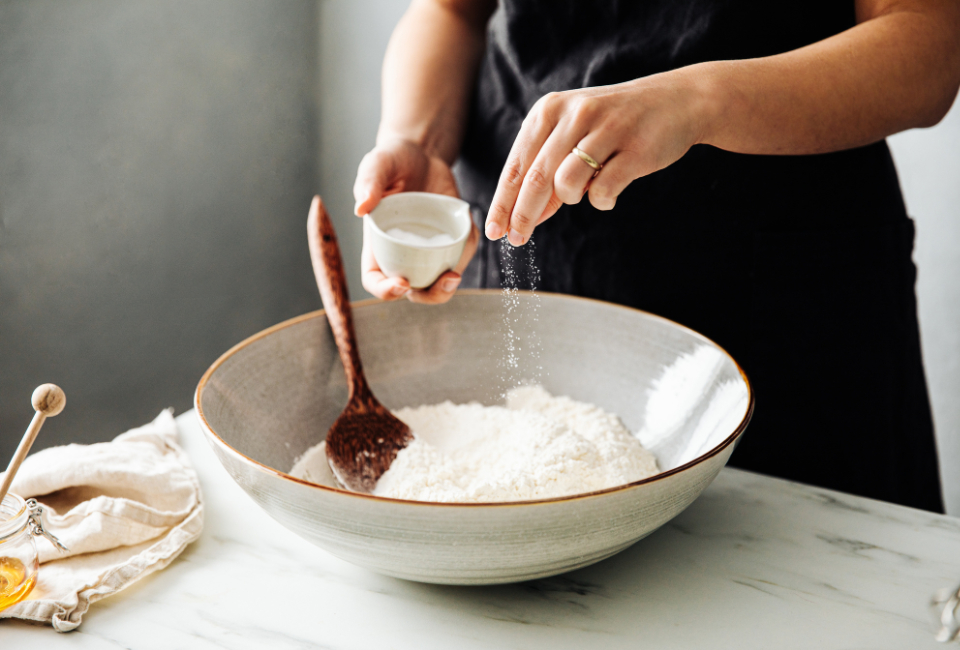
Mix the dough
- In a large bowl, combine the flour and salt. Gradually add the water and mix until the dough is smooth and not sticky.
Roll out the dough
- Using a rolling pin, flatten the dough to about ¼ inch thickness. You don’t want it too thick, or it will take longer to bake.
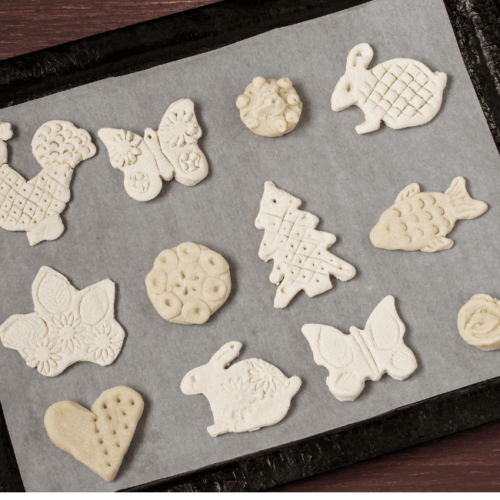
Cut out your ornaments
- Use cookie cutters, jars, or even freehand shapes to cut the dough into fun ornament shapes. Don’t forget to poke a hole at the top if you want to hang them later.
Bake the ornaments
- Preheat your oven to 250°F (120°C) and place the cut dough shapes on a baking sheet lined with parchment paper. Bake for 2–3 hours or until the ornaments are completely hardened.
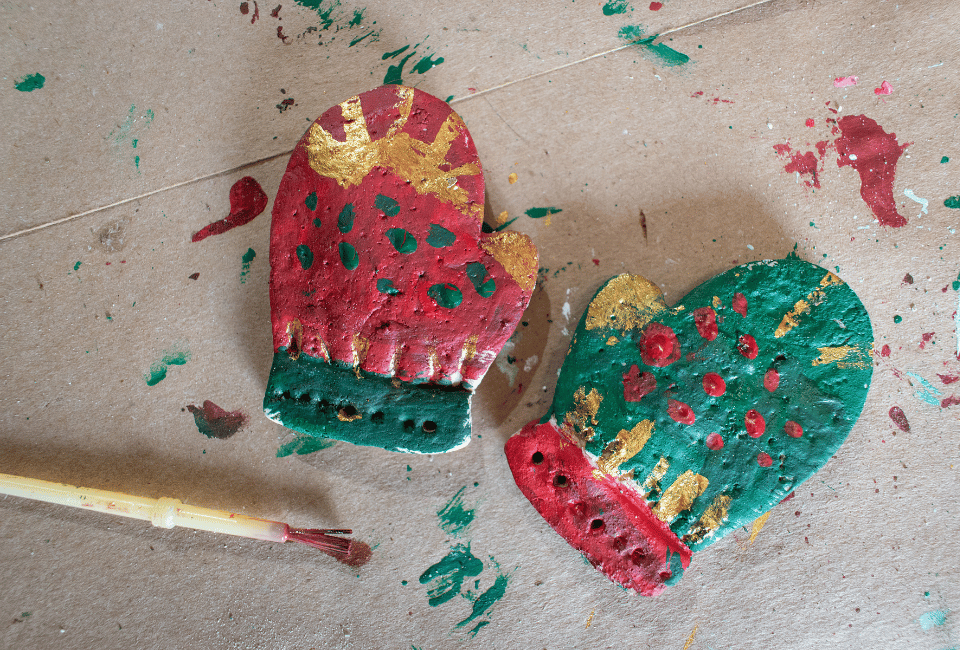
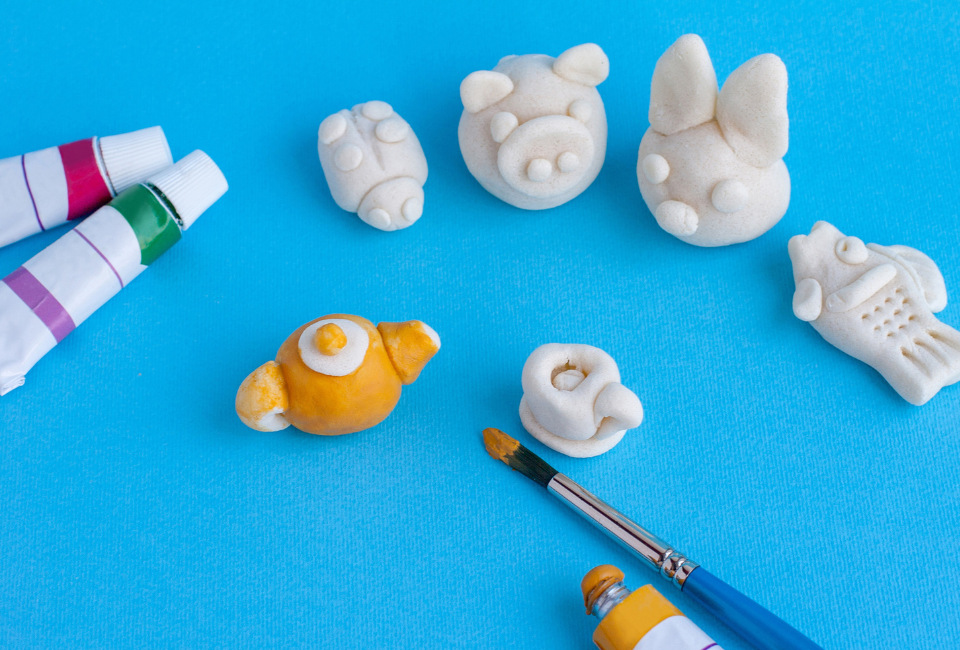
Cool and decorate
- Once your salt dough ornaments are cool, let the kids go wild with paint, glitter, or markers. You can even add a personal touch by writing names or dates on them.
Seal and display
- After decorating, seal your ornaments with a clear spray (like acrylic sealer) to protect the paint. Then, hang them on your tree or use them as thoughtful gifts.
Ingredients:
- 2 cups all-purpose flour
- 1 cup salt
- ¾ cup water (adjust as needed)
Instructions:
- Mix the dough
In a large bowl, combine the flour and salt. Gradually add the water and mix until the dough is smooth and not sticky. - Roll out the dough
Using a rolling pin, flatten the dough to about ¼ inch thickness. You don’t want it too thick, or it will take longer to bake. - Cut out your ornaments
Use cookie cutters, jars, or even freehand shapes to cut the dough into fun ornament shapes. Don’t forget to poke a hole at the top if you want to hang them later. - Bake the ornaments
Preheat your oven to 250°F (120°C) and place the cut dough shapes on a baking sheet lined with parchment paper. Bake for 2–3 hours or until the ornaments are completely hardened. - Cool and decorate
Once your salt dough ornaments are cool, let the kids go wild with paint, glitter, or markers. You can even add a personal touch by writing names or dates on them. - Seal and display
After decorating, seal your ornaments with a clear spray (like acrylic sealer) to protect the paint. Then, hang them on your tree or use them as thoughtful gifts.
✨ Fun Ideas for Salt Dough Ornaments

- Handprint ornaments: Perfect for babies or toddlers.
- Personalized gifts: Add names, dates, or little messages.
- Holiday shapes: Think stars, Christmas trees, snowflakes, and gingerbread men.
- Painted and glittered designs: Go wild with color and sparkle.
These salt dough ornaments are not just adorable — they’re also a fun, hands-on way to create lasting memories with your little ones.
💡 Tips for the Best Salt Dough Ornaments
- Thicker dough = longer baking time. Make sure the dough is uniform in thickness so it bakes evenly.
- Don’t forget the hole: If you want to hang your ornament, make sure to create a hole at the top before baking. A straw works great for this!
- Let it cool: Always allow the ornaments to cool completely before decorating or sealing.
This salt dough recipe can be used for all kinds of creative projects — not just holiday ornaments. You can even create custom gift tags or keepsake handprints for parents and grandparents.
🎁 Why We Love This Salt Dough Ornament Recipe
- Inexpensive: Flour, salt, and water — that’s it!
- Kid-friendly: Great for hands-on crafting with toddlers or older kids.
- Timeless: These salt dough ornaments can be kept for years, making them perfect for a yearly tradition.
- Customizable: Get creative with paint, glitter, and more.
🎄 Final Thoughts on Salt Dough Decorations
The beauty of a salt dough recipe is that it’s simple enough for even the youngest crafters, but versatile enough to create unique, personalized pieces every time. Whether you’re making salt dough ornaments for your tree, gifts for loved ones, or just having fun with the kids, this craft is sure to bring joy and memories.
📌 Save this easy salt dough recipe for your next family craft day, and be sure to tag me in your creations!


Leave a Reply